I was asked to participate in the Room for Improvement challenge by MoneySupermarket. I had the weekend to improve one room in my house with a mini makeover with a budget provided of £50. I thought it was a great challenge to see what I could do on a small budget so that I could show my readers that its not just about money, but creativity and ingenuity.
The Room for Improvement: Living Room. I chose this room as we spend a lot of time together in this room. We work, read, play games, watch films, and do homework.
Previous Design Choices: Prior to this challenge we swapped out our three tall bookcases for just one and two of the 2 by 2 cube IKEA shelves from my sons’ room. We flanked the one tall bookshelf by the fireplace and the put the two square shelves in the nook by the window. Our newly acquired sofa (we went months without a proper place to sit) can only fit against the one wall.
Challenges:
- Renting. Since we do not own this property we can not do any painting of the walls, changing of the carpets or flooring, and limited by not being any new holes (ie by nails) into the walls.
- Wallpaper. Our walls are all wallpapered and as we are renting we are pretty much stuck with whatever colour and pattern that exists currently.
- Carpet. As we have to work around the carpet it limits me by its blue colour and its slightly busy pattern It is quite old with what I can tell is set in chemical stains from previous tenants. If we owned the place I would have replaced it already with wood flooring.
- Room layout. There really is only so many places I can put the sofa and our tv stand given the dimensions of the walls and placements of the doors, the heater, window, fireplace, and window.
Having never lived in one place for longer than three years at a time and sometimes for only a few months, I am quite accustomed to having to work with a new space. I am also used to being creative when it comes to redecorating and improving a room in a place that you rent. Had we owned this property this would probably be a DIY of painting the walls, pulling up the carpet, and fixing the floor with reclaimed wood. Since that is not the case I would like to share with you how you can improve your room with £50 or less. As some of my room improvement tricks work well with what you already own. Let me show you what the room looked like in the beginning.
T H E B E F O R E P H O T O S :
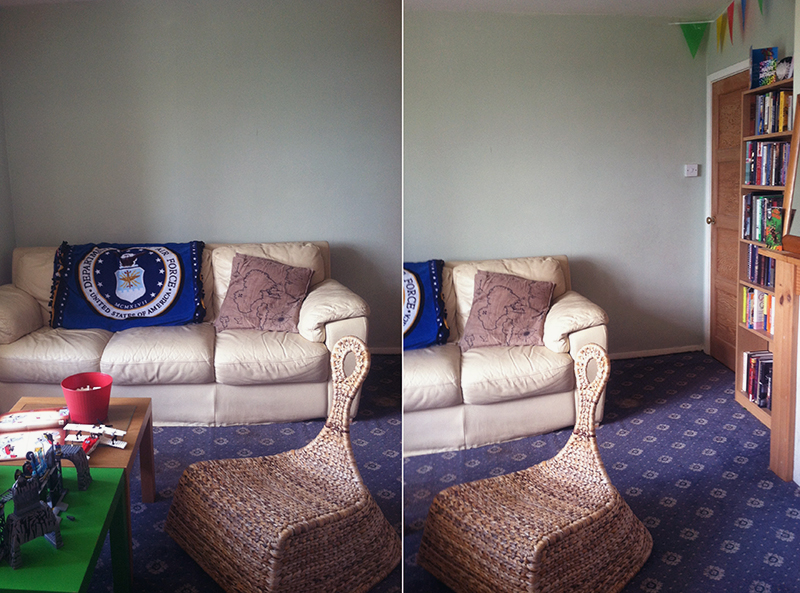
Here you can see all my sons’ legos have taken over almost every surface in the room. We do live and play in this room quite a lot and it has become more of the lego room than anything else at this point.
A blanket thrown over the couch, mismatched toy tables for lego and another token IKEA chair. Not much of a vision really going on at this point.
Here you can see signs of the birthday party a couple weeks past with the bunting and birthday cards. Oh did you see that in the corner? More legos in large containers hide up on the bottom shelf.
THE PLAN:
1. Clear out what is unusable, not needed, outdated, and not working in the space. This is the perfect time to pick up all the orphans from other rooms that have found their way into cluttering the space. For me this was clearing up from a birthday party with the displayed decorations and birthday cards. There were also a huge amount of my sons’ Legos out from the last two weeks worth of Lego builds.
2. Search your house for furniture and items that may work well in the new space.
Our coffee table was not purposeful for lego play and had been previously swapped out with smaller mismatched tables. I decided to move those out and bring in the coffee table. I also brought in a small half circle glass table which has made its rounds through out my house and now has found a home in this space. I brought in a chair for reading that had been in another room.
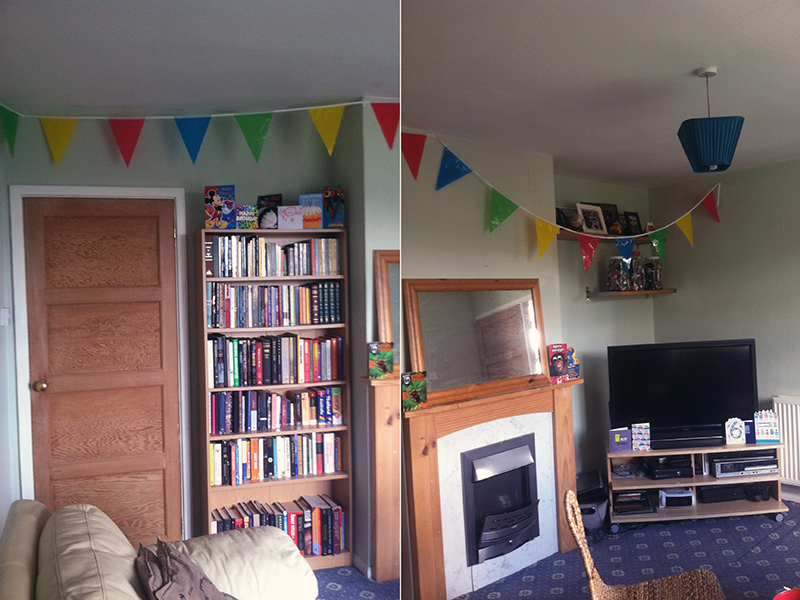
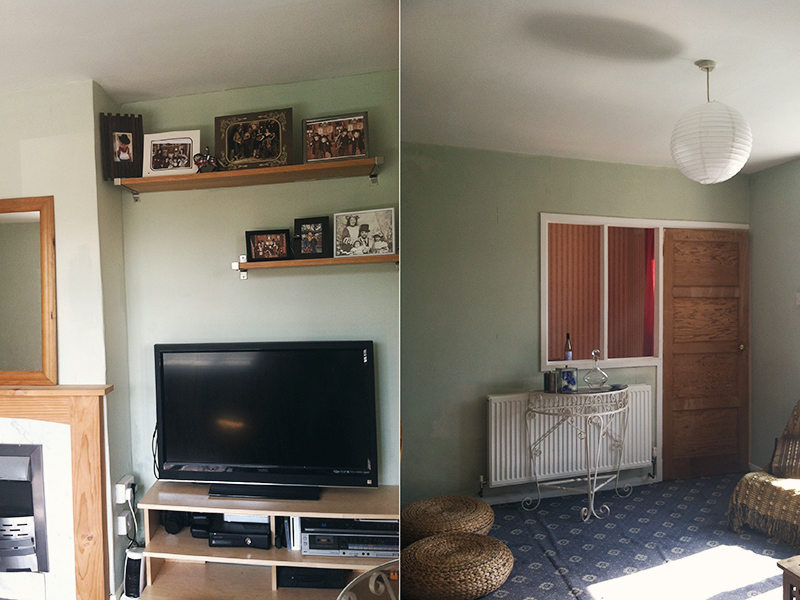
3. Move furniture around the room to give a more desirable affect of space. While I would love to move the sofa it is perfect where it is now. Our television stand had been cocked at an angle to round out a corner or the room and make it easier to view from the sofa. However our XBox has since stopped working and since we do not get cable television, the telly has become more of a piece of wall art. I decided to move the tv stand back into the wall until it was flushed against the side of the fireplace.
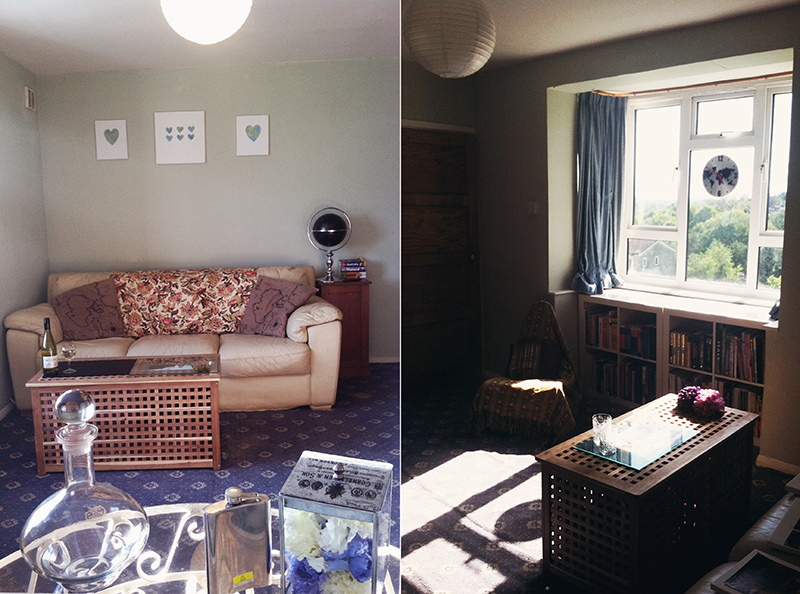
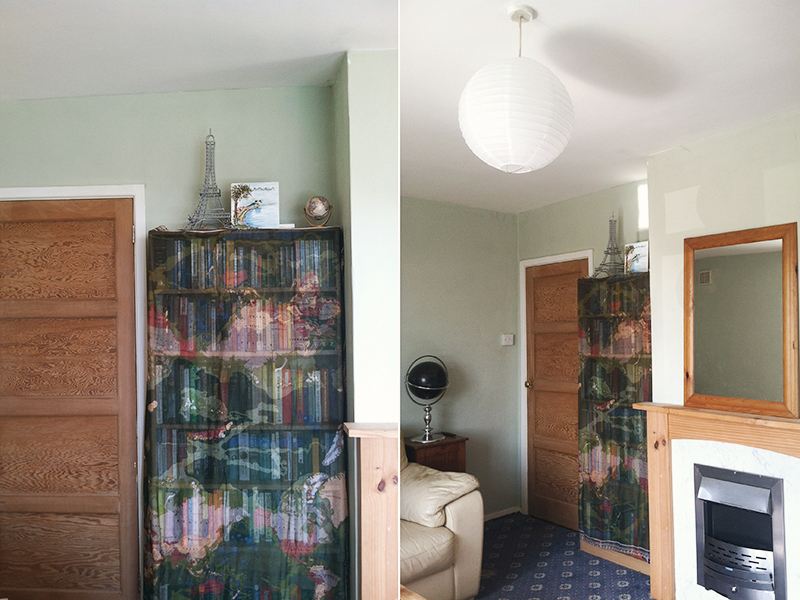
4. Change or rotate items to give a different dimension to the space. We have a mirror that was hung horizontally above the fireplace. It no long hangs from the hook and rests right on top of the mantel. Due to this we can see an unslightly nail. I decided to rotate the mirror so that it stand vertically and above the fireplace it gives a nice tall line. This can also be achieved by hanging your curtains taller than the window and getting longer curtains that touch the floor for an elongating effect. Since we have book cases in the window nook this would not work with our space.
5. Change out the light fixtures. We have one light fixture in our living room and was a blue shade that matched the carpets. It was nice enough but since the ceiling is white it became more of an eye sore up in the middle. I replaced it with a matching white shade for better lighting and a more seamless look with the white ceiling.
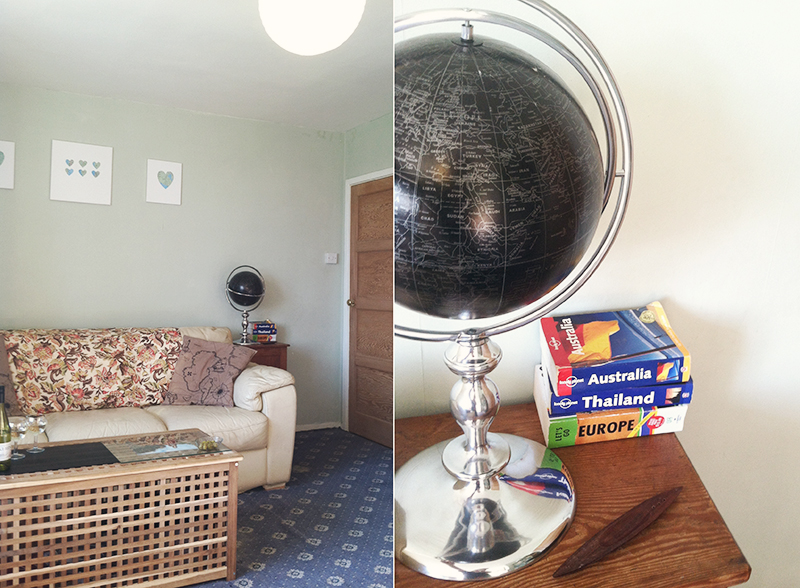
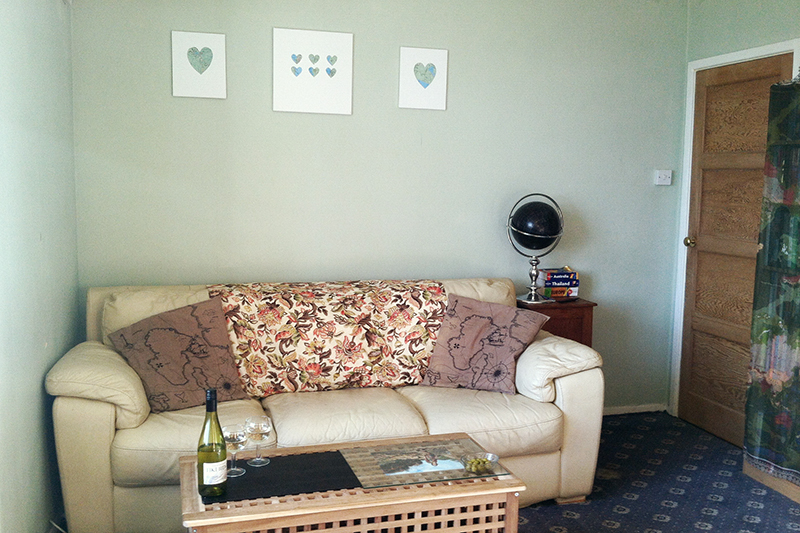
6. Use what you have. Working with the decor items you have on hand go through and fix the placement of items in the space. Try a few different looks and if something does not look right, take it out of the room. I reorganized our displayed photographs and added touches of horses to match the western flair. I brought in travel items for decor, like a small globe, the eiffel tower, and pieces from our travels. To fit the travel theme I also showcased a few travel books. I have acquired a scarf that has the world map on it and have decided to repurpose it with shielding our tall bookshelf. what I like about it is that it is slightly transparent so that you can see the books from behind it while still recognizing the continents and countries displayed on the fabric.
7. DIY projects. With the ease of Pinterest there are so many DIY projects you can do at home to upgrade and improve your room. I took three blank canvases and an outdated travel book from Hawaii to make pieces of wall art to hang on the blank wall behind our sofa. I used big hearts for the two places on the island where we rented and where we owned a home. I cut out little hearts for meaningful places on the island like the hospital where my son was born, our favourite beach, and the base where my husband was stationed with the military. It has provided us with simple and clean art on our wall that means so much to our family. The added bonus was realizing afterwards how the colorization in the map blends well with the colour of the wallpaper. I was able to hang them up by using a wall friendly adhesive strip that work like velcro without making any holes in the wall.
8. Bring in new items. As I was given £50 to spend on the room for improvement I went into town planning to only buy used items from charity shops. On top of finding great deals for previously owned items the money goes to charity. However that did not go to play this time around. I was planning on buying items I found, instead of going in with a plan of what I wanted and it can be a hit or miss at the charity shops. With being on foot and having to carry everything home I changed my game plan after attempts in two shops. A T.K.Maxx just opened in Bath, England and they have a pretty nice selection of home wares Sure enough in about twenty minutes I was ready to check out after spending close to the £50.
T H E A F T E R P H O T O S :
Also to note I used one of my fashion photographs from Hawaii under the glass table top and recovered the IKEA reading chair with our Thai bed spread and matching pillow we brought back from Thailand.
I love the travel accents because it not only fits our family but becomes a great conversational starter.
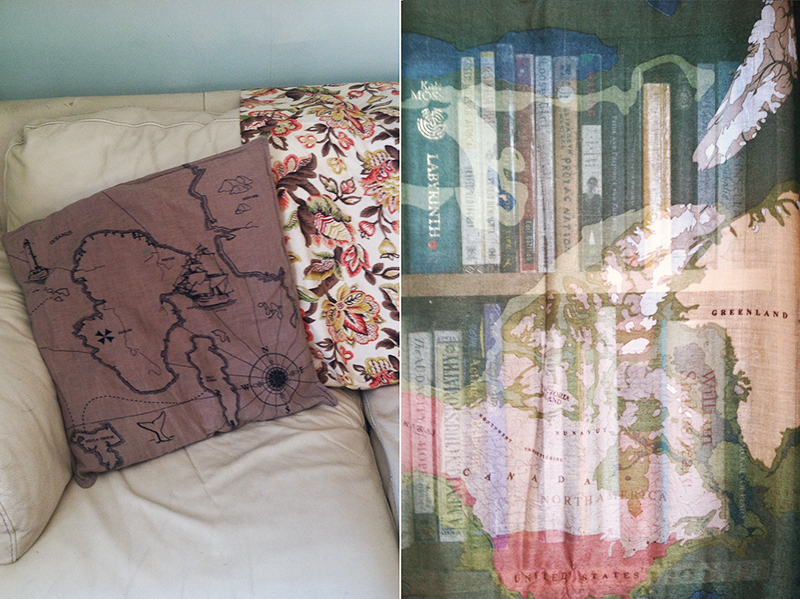
I do plan to eventually use the fabric over the couch to make additional couch pillows. I found the fabric earlier on in the year at a farm shop in the vintage second hand section and fell in love with the pattern.
On top of the bookshelf is my Eiffel Tower figure, a ceramic paint painted with a scene of the Bay of Naples, where I grew up as a child, and a smaller globe that had previously been in my sons’ room when they had an Indiana Jones themed bedroom.
The photos on the shelf are mostly of my family during those silly western styled shoots. The two that are not fit in with the theme. One is my oldest at two months old when I dressed him up in his Build-A-Bear cowboy outfit and the other is of my dad, mum, and my husband when they got their photo with Woody at Disneyland. My dad is in half of the photos and since he has passed away, they are my favourite ones to display. There is also a hores shoe turned hook and the symbolic gift of a girl horseback riding my husband gave me as a place holder for a new riding helmet.
Though this little table will have to move when I need to dry laundry, we really wanted to make use of the wasted space the space heater takes up. We decided to use the table that matches it in colour to keep it friendly to the eyes. Would like to eventually get a table that half the normal table size in width to go over the space heater and give us a place to set our drinks and decanter.
This is close up of the fabrics included in this room for improvement challenge.
What I Purchased:
A Globe. As we sort of had a few travel items already I chose a nice focus item to help solidfy the theme of the room. It was £24 and at half my budget it was a risk I was willing to take after finding everything else I needed for such low prices. I normally never would buy something like this for myself and it was lovely to be able to improve my room with such a great accent piece.
Black Place Mat. This item that I found in the kitchen area has a faux leather appearance. I liked that it matched the globe and knew it would tie in well with other black pieces in the room. Since our coffee table has grid like holes in it, having a nice flat surface would be a great improvement when it came to having a place to set our drinks. It was only £2.99.
Two glases and a Dish. Setting out to find some texture and detail to put in the space I found these two glasses and matching dish. I though this would be perfect for my husband and I who like to enjoy a drink together after the kids go to bed. The dish would be perfect for a snack item, like the olives pictured in the after photos. Remember just because an item has one intended purpose, does not mean it can not be used for something else. This was true with these three items which were sold to be used in a bathroom. However they fit nicely in our living room and are pictured as vases here.
Glass Container with metal stamped lid. I was originally looking for a large vase I could display items in. Something that I could easily interchange for seashells at summer or christmas bobbles in the winter. I found this lovely piece for only £5.99 and decorated it with silk flowers I had in storage.
White Paper Lantern. When I saw the price for this at a hardware shop, I could not leave without purchasing it. It was a simple, easy, and cheap way to improve the room. I just wonder why I had not done this sooner. This cost £3.
The Breakdown:
Globe – £24.99
Glass Container – £5.99
Two Glasses – 7.98
Dish – £2.99
Placemat – £2.99
Light Fixture – £3.00
Total: £47.94

After the room was all ready and the photos had been taken I called my husband in from outside. He was improving our backgarden, where the grass has been growing like wildfire. What better way to refresh from the hot sun then a nice glass of white wine and some olives to snack on too.
So this was how I tackled the Room for Improvement Challenge in a rented house with just £50.
Q: What do you think? Any thoughts or suggestions?


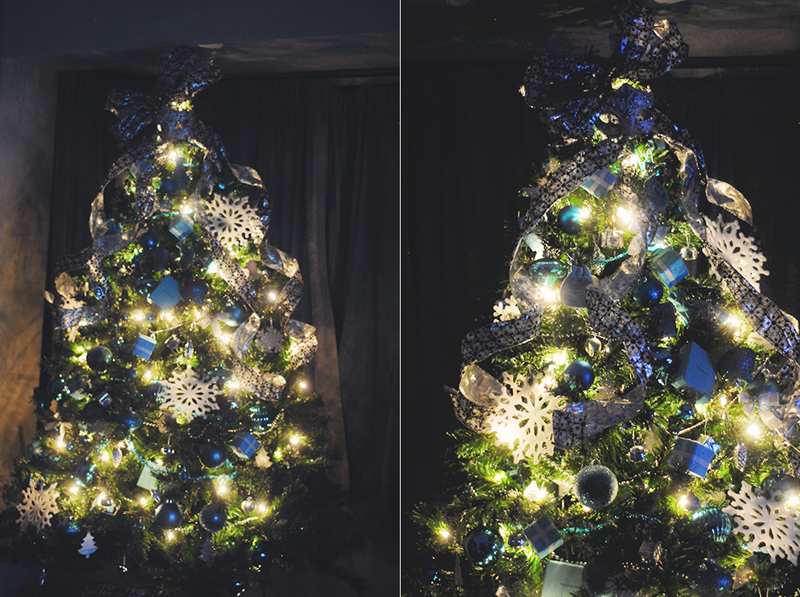


 Q: If you put up a tree this year, what was your theme if you had one? Or tell me what your tree looks like!
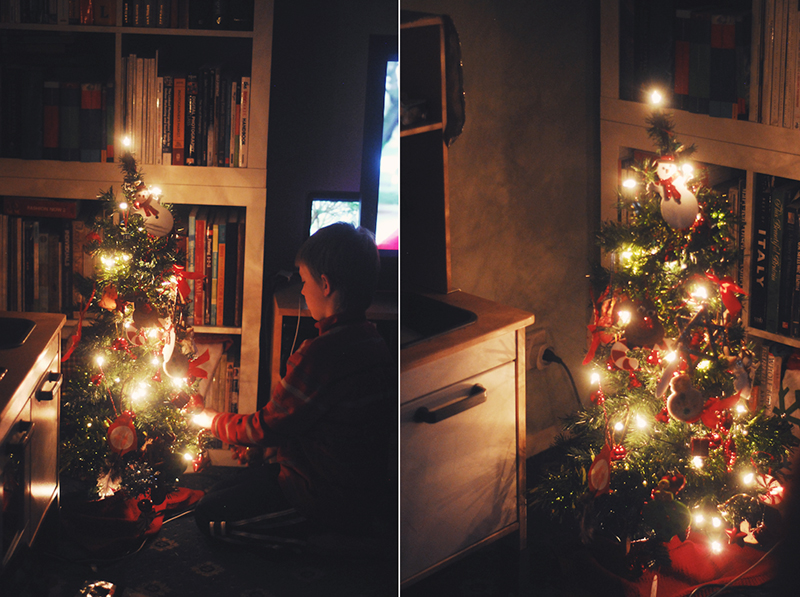