Category Archives: entertaining

Paleo Dinner Party

Bonnie Rose Photography © 2007 – 2013 All Rights Reserved – www.bonnie-rose.co.uk
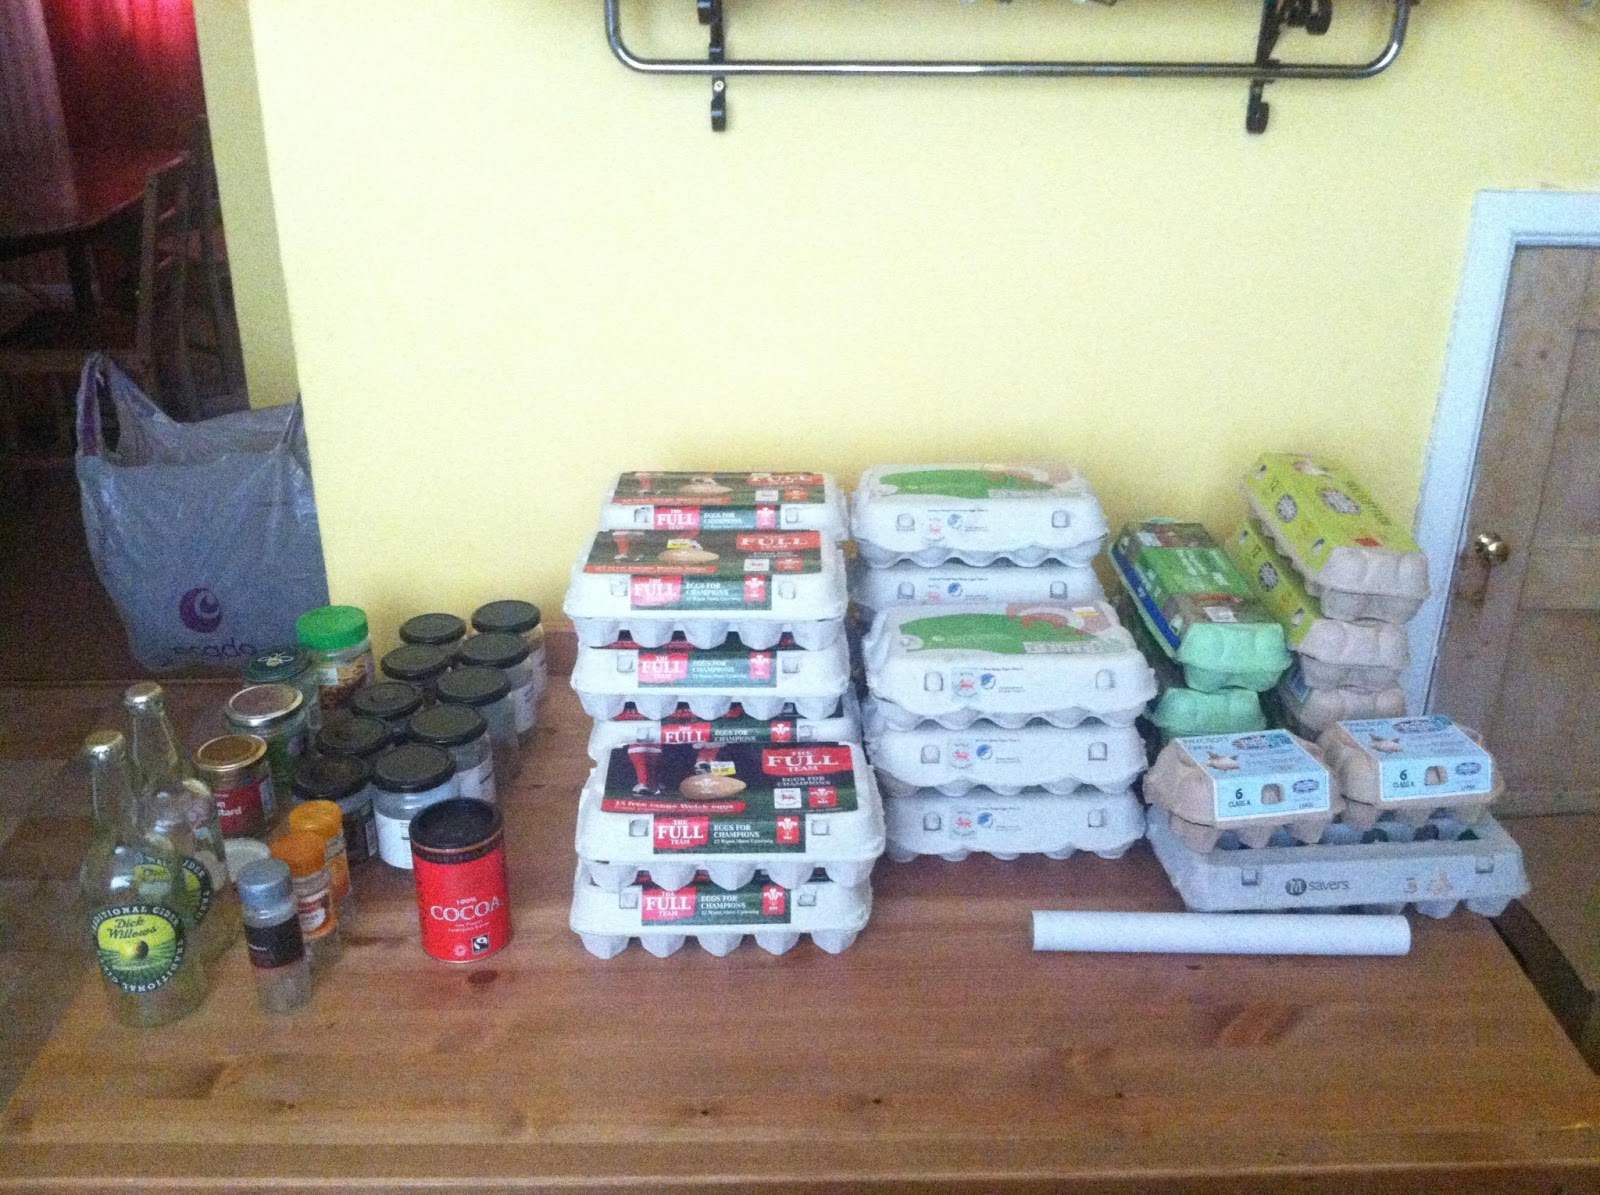
I can cook. My husband however has an amazing passion for cooking.  His culinary interests surfaced over the last few years of our marriage and now he does the majority of the cooking and meal planning for our family.  As expats what has made living in England so exciting is easy resource to organic and local produce.  We can order our meat from the nearby butcher, pick up our fruit and veg from local food markets, and even have our vegetable boxes delivered from organic farms. In fact it has been months now since I last stepped inside a grocery store as we can get everything else we need delivered to the home.  This is a huge difference from living on military bases where you bought what you could find and tried hard not to shop on or the days after payday.  I believe being able to have such an amazing access to high quality, variety, and fresh foods have been the foundation of my husband’s journey  in cooking.  
In a month we will have my mum and sister over to celebrate our 10th wedding anniversary with a vow renewal in the Snowdonia region of Wales.  As we were researching places to stay our biggest concern was about having an adequate kitchen.  My family adores Ryan to pieces and they are so excited to have him cook for them again.  We have been compiling his favourite recipes as we look forward to entertaining with my family and our friends in Wales.  Which makes this a perfect opportunity to participate in an entertaining competition with Taylor Wimpey. I have been asked to put together a menu of a starter, main, dessert, and drinks to serve as I bring my family together this summer.  I am trying my best to keep this mainly paleo as my family all eats a similar diet.  Since we are a multi cultural family who has lived in many places I made sure to reflect different aspects of that in the menu and ingredient choices. 


THE MENU
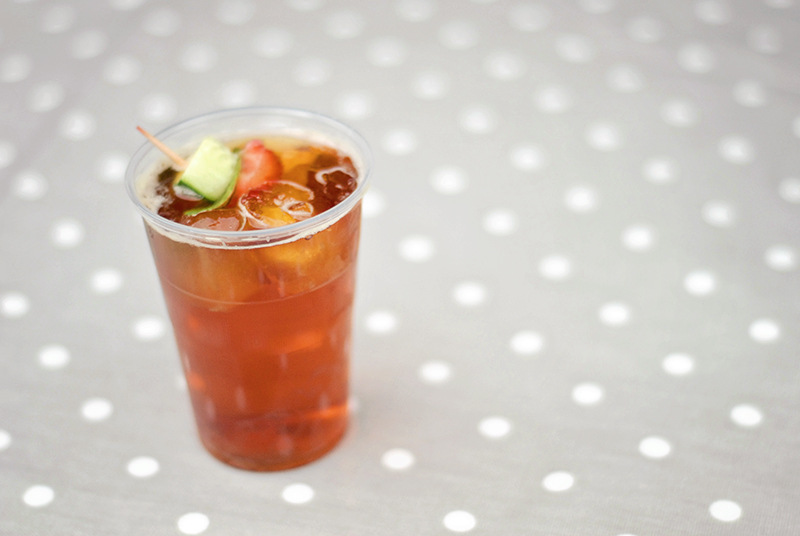
Welcome Drink – English Garden
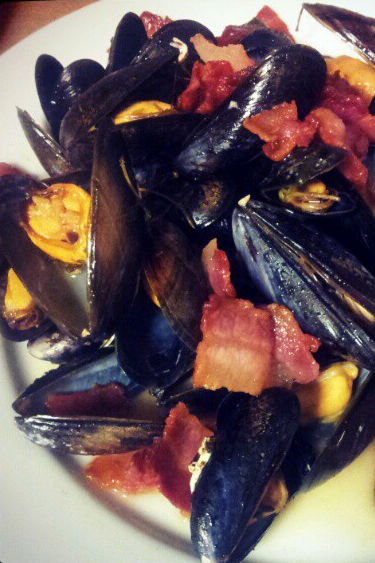
Starter – Bacon and Cider Mussels
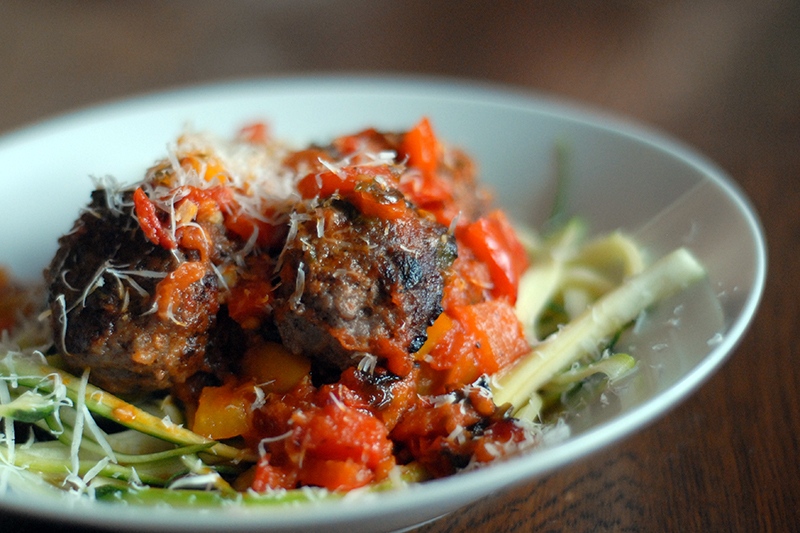
Main – Courgetti and Meatballs
Dessert – ‘Get Some’ Ice cream
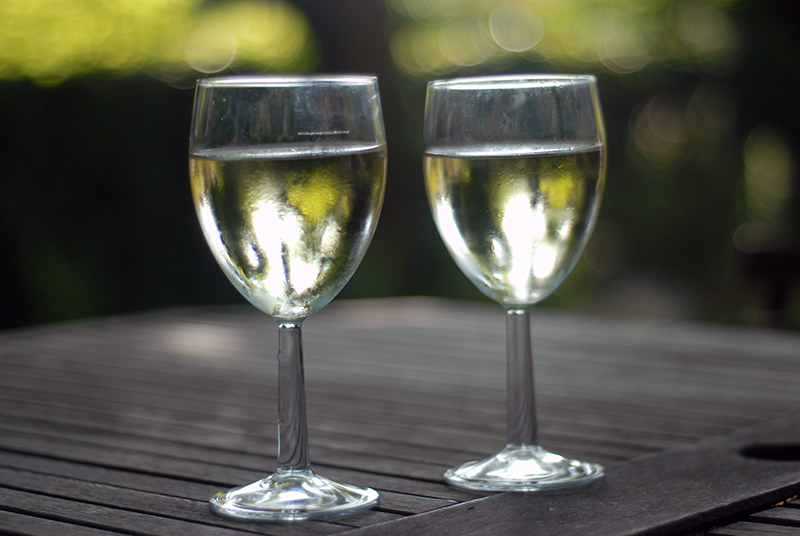
Wine – Sangiovese
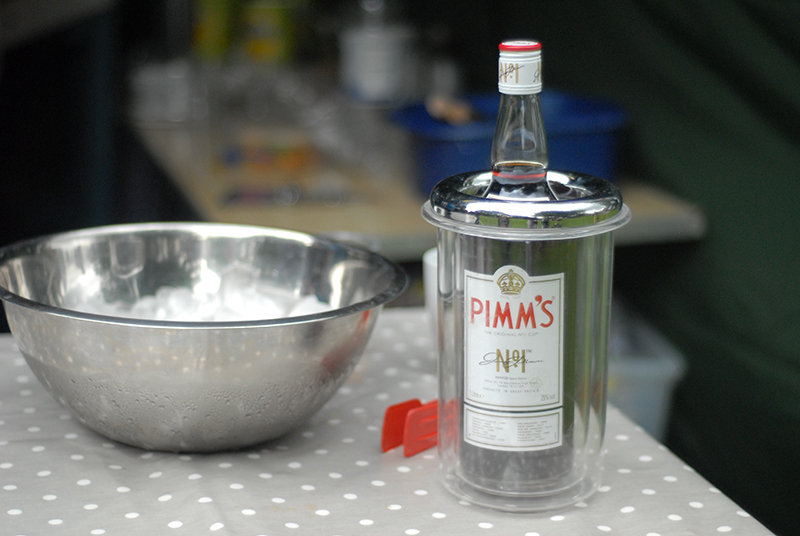
Welcome Drink: English Garden
Bonnie Rose Photography © 2007 – 2013 All Rights Reserved – www.bonnie-rose.co.uk

This will be directions to make per individual glass.
Ingredients
Four fresh mint leaves, chopped
1/2 a tsp of grated ginger root
3 slices of cucumber
1 tsp of stevia or fair trade raw cane sugar
Gin
Soda water
Directions
Put the mint, ginger, and cucumber at the bottom of the glass. Fill the glass with ice. Add one part gin to three parts soda water. Stir so that the ingredients mix throughout the drink. While you are stirring add the sweetener. 
The Starter: Bacon and Cider Mussels
Bonnie Rose Photography © 2007 – 2013 All Rights Reserved – www.bonnie-rose.co.uk

Ingredients
1Kg of mussels, scrubbed clean and de-bearded. 
2 cloves of garlic, finely sliced
150ml of cider (an alcoholic cider, for my American readers)
or
1tbsp of Apple Cider Vinegar and add water until the mixture equals 150ml 
One bunch of parsley, chopped
150gr of smoked bacon lardons
Grass fed unsalted butter
Coconut oil
Directions for Mussels:
In a pot (or pan that has a lid) melt a tbsp of butter and fry the smoked bacon lardons until crispy. Take the lardons out and set aside but keep the fat in the pot.  Melt a tbsp of coconut oil. Add the mussels, the cider, and garlic. Cover and let them steam for about four minutes or until they have all opened. You will want to shake them around in the pan occasionally to prevent them from burning. Take the mussels out and set aside, leaving the cider mixture in the pot. Add the parsley and half of the bacon and cook for two minutes.  Pour over the mussels and then sprinkle the remaining bacon over the muscles. 
The Main: Courgetti and Meatballs
Bonnie Rose Photography © 2007 – 2013 All Rights Reserved – www.bonnie-rose.co.uk

Ryan’s Paleo ‘Courgetti’ and Meatballs
My family grew up in southern Italy and so Italian food has always been a quintessential part when we get back together.  What I love about ‘real’ Italian food in my home of Napoli, is that the dishes keep it simple.  You can taste every one of the ingredients with each bite.  It is probably why I am not a huge fan of ‘American-Italian’ food which can contain a lot of dishes that are covered in heavy sauces, smothered in cream and cheese, and have chicken thrown in for good measure. This recipe is perfect as I feel it meets my needs for Italian food while satisfying the needs of a Paleo diet. 
Sauce
3-4 cloves of garlic finely chopped
1 chopped chille (omit if you do not like spicy)
500 gr of freshly chopped tomatoes
Fresh basil to taste, chopped
6 oz. of  wine, Pinot Grigio 
Sea salt to taste
Coconut Oil (or butter)
Directions for Sauce:
1 tbsp of coconut oil melted in a pot and add the garlic. Let the garlic cook on a medium low heat, just until it gets brown but before it gets crunch.  Follow with adding the tomatoes on an increased high heat setting.  Crush the tomatoes as you stir them in the pot until you get a thick liquid texture with chunks of broken down tomatoes.  If you are adding peppers, now is the time to add them and let them cook for two minutes.  Add the remaining ingredients.  Let it stay on high heat until it starts to boil. Then cover and put on low heat to simmer for at least 30 minutes.  You do not want to cook all the water out of it, but if you wanted to simmer it for longer you can. 
Noodles
For a family of four we use 3 courgettes. For two people I would suggest two. Take the courgettes and chop the ends off and discard. Slice the courgettes in a mandoline into your preferred size.  If you do not have a mandoline you can use a knife or if you wanted really thing noodles could use a vegetable peeler.  If you use the peeler you will then need to cut them into strips afterwards.  Put a colander in a large bowel and add the courgette noodles to the colander   Add enough sea salt to distribute evenly with the noodles to help suck the water out of them to make them pliable.  Set aside.
Time to Start the Oven: Preheat oven to 190C/375F/Gas Mark 5
Meatballs
500 grams of meat
1/2 red onion, chopped
1 egg
This is per preference, but my husband likes to mix 250gr of minced pork with 250gr of minced beef. However if you want all beef or all pork you can use 500gr of your choosing.  
Directions for Meatballs
Crack and beat an egg in a bowl and mix with the meat and the onion and mix together evenly with your hands.  The size can vary but golfball size meatballs works well or you can make a bigger meatball per person.  Once your meatballs are formed take a skillet or pan and heat up 1/2 a tbsp of coconut oil.  Add the meatballs and cook them until they are nice and brown on all sides. 
Final Preparation
Take a casserole dish and add the meatballs. Take the sauce that has been simmering and pour on top of the meatballs. Put in preheated oven, uncovered, for about forty minutes.  Put the noodles on plates or in bowls, spoon the sauce and meatballs on top. If desired grated parmesan on top. Garnish with two our three basil leaves. 

Dessert: “Get Some” Ice Cream

This is a recipe from the Life hacker who bases a lot of recipes off of a Paleo idea. 
You can read more at: http://www.bulletproofexec.com/

Ingredients
4 whole eggs (pastured of course)
4 yolks (in addition to the whole eggs above)
2 tsp vanilla (I use Bulletproof Vanilla)
1 gram vitamin C (ascorbic acid) or 10 drops apple cider vinegar or lime juice to taste.
100 grams (7 tbs) grass-fed butter
100 grams (7tbs) coconut oil (or substitute half Upgraded Cacao Butter for amazing taste)
50 grams (3tbs + 2tsp) MCT oil (important for consistency)
80 grams (5.5tbs) xylitol or erythritol (or more to taste – you can add up to 160 grams if you want)
~100 grams water or ice (just under 1/2 cup; add less than you think you need, then increase the amount).
(optional) 1/4 to 1/2 cup of low-toxin Upgraded Chocolate powder

Directions for Bullet Proof Ice Cream:
Blend everything but the water/ice in blender. It takes a while to get the butter blended into perfect creaminess.
Add water or ice and blend some more until well blended. Ideally, you want a yogurt-like consistency for creamy ice cream, or add more water for a firmer, icier texture
Pour the mixture into an ice cream maker and turn it on.
This will make perfect consistency ice cream. 

Wine
Bonnie Rose Photography © 2007 – 2013 All Rights Reserved – www.bonnie-rose.co.uk

I recommend Sangiovese or if you want something with a twist of something different, Valpolicella.  Although if your guest prefer a white wine, you could offer the option of the white wine that you used from the sauce to compliment the menu. However I have to state that my sister is a level II sommelier and she most definitely take the lead when it comes to choosing and pairing wines with our meals this summer.  I look forward to hearing what she has to say about this menu.  
Final Notes: 
I do not like the negative connotation that the word ‘diet’ draws up as some think that its something you do for a short period of time to lose weight.  I believe that eating is a way of life. At home we have a diet that is based off of Paleo and is rooted around information you can find from the Bullet Proof Exec.  
This was a post for the Taylor Wimpey Dinner Party  competition.  You can read more about Taylor Wimpey and the competition here: http://www.taylorwimpey.co.uk/blog/2013/april/dinner-party-competition.htm

xx
B.

*Photography unless cited belongs to Bonnie Rose Photography © 2007 – 2013 All Rights Reserved – www.bonnie-rose.co.uk


Recipe: Pims & Simple Oat Cookies

Earlier this month we went to the village fete in Monkton Farleigh, this weekend a fete in Batheaston, and in two weeks time we will be at another nearby. Nothing says Summer in Great Britain than a lovely village fete, a jug of Pims, and an array of baked goods. If you find yourself lacking a fete nearby, you can bring the best elements to your home. This blog post includes recipes we have used recently at our home here in England. The first is a recipe for how to make Pims. You pretty much cannot go to any function during the summer without having Pims available. It will also be the cause for a long que and the first thing to run out. 
I mention Pims quite a lot in my blog and tweets during the summer months and have been asked by those in America what it is exactly. Pims in the bottle itself is a gin-based drink containing ‘a secret mixture of herbs and liqueurs’. There are several different recipes for different drink variations but the most common one calls for Pim’s original, ice, lemonade, and the fruit/veggie garnishes. If you are not accustomed to lemonade in England it is not the same as its American variety. Lemonade in England is a lemon flavored carbonated drink. If you do not have any fizzy lemonade on hand we have made it with sparkling water and fresh lemons and it has turned out just perfectly. I have included the print ready recipe from the official Pim’s website. Make sure to check it out for their other drink varieties.


The next recipe I want to share is a really simple oat cookie or biscuit. It is easy because you can make it with just 4-5 ingredients and ones you probably have at home already. They are perfect for those last minute guests that come over for tea and are sure to please the masses. They are also simple enough for kids and makes a great family activity for after school.

Ingredients:
170g (6oz) butter
115g (40z) caster sugar*
225g (8oz) self-raising flour
57g (2oz) porridge oats
1 tsp vanilla extract

*I like to substitute with organic set honey.  Just use a little less honey than the amount of sugar needed to make sure you get the right cookie dough consistency.  

Directions:Preheat the oven to 180 degrees or Gas mark 4. 
Greece a cookie sheet with coconut oil.
Cream together the butter and sugar/honey until light and fluffy.
Add vanilla extract.
Sieve in self raising flour.
Set aside one ounce of the porridge oats and mix the remaining oats into the mixture.  
Knead the cookie dough and then roll into twenty small balls.  
Roll each ball in the remaining porridge oats and press down on a greased baking tray.
Bake cookies in the oven for about fifteen minutes or until golden brown. 


These lovely oaty biscuits are small, perfect with tea, and if your family is like mine the biscuits will disappear quickly!  I hope you enjoy both of these recipes and let me know how you get on if you try them out. 

Q: Have you had Pim’s before?

xx
B. 

Room For Improvement £50 Challenge

DIY Map Art

I was asked to participate in the Room for Improvement challenge by MoneySupermarket.  I had the weekend to improve one room in my house with a mini makeover with a budget provided of £50.  I thought it was a great challenge to see what I could do on a small budget so that I could show my readers that its not just about money, but creativity and ingenuity.

The Room for Improvement: Living Room.  I chose this room as we spend a lot of time together in this room.  We work, read, play games, watch films, and do homework.

Previous Design Choices: Prior to this challenge we swapped out our three tall bookcases for just one and two of the 2 by 2 cube IKEA shelves from my sons’ room.  We flanked the one tall bookshelf by the fireplace and the put the two square shelves in the nook by the window.  Our newly acquired sofa (we went months without a proper place to sit) can only fit against the one wall.

Challenges:

  • Renting.  Since we do not own this property we can not do any painting of the walls, changing of the carpets or flooring, and limited by not being any new holes (ie by nails) into the walls.  
  • Wallpaper. Our walls are all wallpapered and as we are renting we are pretty much stuck with whatever colour and pattern that exists currently. 
  • Carpet. As we have to work around the carpet it limits me by its blue colour and its slightly busy pattern   It is quite old with what I can tell is set in chemical stains from previous tenants.  If we owned the place I would have replaced it already with wood flooring. 
  • Room layout.  There really is only so many places I can put the sofa and our tv stand given the dimensions of the walls and placements of the doors, the heater, window, fireplace, and window.  
Having never lived in one place for longer than three years at a time and sometimes for only a few months, I am quite accustomed to having to work with a new space. I am also used to being creative when it comes to redecorating and improving a room in a place that you rent.  Had we owned this property this would probably be a DIY of painting the walls, pulling up the carpet, and fixing the floor with reclaimed wood.  Since that is not the case I would like to share with you how you can improve your room with £50 or less.  As some of my room improvement tricks work well with what you already own.  Let me show you what the room looked like in the beginning.
T H E   B E F O R E   P H O T O S : 
Here you can see all my sons’ legos have taken over almost every surface in the room. We do live and play in this room quite a lot and it has become more of the lego room than anything else at this point.
A blanket thrown over the couch, mismatched toy tables for lego and another token IKEA chair. Not much of a vision really going on at this point. 
Here you can see signs of the birthday party a couple weeks past with the bunting and birthday cards. Oh did you see that in the corner? More legos in large containers hide up on the bottom shelf. 
THE PLAN:
1. Clear out what is unusable, not needed, outdated, and not working in the space.  This is the perfect time to pick up all the orphans from other rooms that have found their way into cluttering the space.  For me this was clearing up from a birthday party with the displayed decorations and birthday cards.  There were also a huge amount of my sons’ Legos out from the last two weeks worth of Lego builds.  

2. Search your house for furniture and items that may work well in the new space. 
Our coffee table was not purposeful for lego play and had been previously swapped out with smaller mismatched tables.  I decided to move those out and bring in the coffee table. I also brought in a small half circle glass table which has made its rounds through out my house and now has found a home in this space. I brought in a chair for reading that had been in another room.  

3. Move furniture around the room to give a more desirable affect of space.  While I would love to move the sofa it is perfect where it is now.  Our television stand had been cocked at an angle to round out a corner or the room and make it easier to view from the sofa.  However our XBox has since stopped working and since we do not get cable television, the telly has become more of a piece of wall art.  I decided to move the tv stand back into the wall until it was flushed against the side of the fireplace.  

4. Change or rotate items to give a different dimension to the space. We have a mirror that was hung horizontally above the fireplace.  It no long hangs from the hook and rests right on top of the mantel. Due to this we can see an unslightly nail. I decided to rotate the mirror so that it stand vertically and above the fireplace it gives a nice tall line.  This can also be achieved by hanging your curtains taller than the window and getting longer curtains that touch the floor for an elongating effect. Since we have book cases in the window nook this would not work with our space. 

5. Change out the light fixtures. We have one light fixture in our living room and was a blue shade that matched the carpets. It was nice enough but since the ceiling is white it became more of an eye sore up in the middle.  I replaced it with a matching white shade for better lighting and a more seamless look with the white ceiling. 

6. Use what you have. Working with the decor items you have on hand go through and fix the placement of items in the space.  Try a few different looks and if something does not look right, take it out of the room.  I reorganized our displayed photographs and added touches of horses to match the western flair.  I brought in travel items for decor, like a small globe, the eiffel tower, and pieces from our travels.  To fit the travel theme I also showcased a few travel books.  I have acquired a scarf that has the world map on it and have decided to repurpose it with shielding our tall bookshelf.  what I like about it is that it is slightly transparent so that you can see the books from behind it while still recognizing the continents and countries displayed on the fabric.  
7. DIY projects. With the ease of Pinterest there are so many DIY projects you can do at home to upgrade and improve your room.  I took three blank canvases and an outdated travel book from Hawaii to make pieces of wall art to hang on the blank wall behind our sofa.  I used big hearts for the two places on the island where we rented and where we owned a home. I cut out little hearts for meaningful places on the island like the hospital where my son was born, our favourite beach, and the base where my husband was stationed with the military.  It has provided us with simple and clean art on our wall that means so much to our family.  The added bonus was realizing afterwards how the colorization in the map blends well with the colour of the wallpaper. I was able to hang them up by using a wall friendly adhesive strip that work like velcro without making any holes in the wall.
8. Bring in new items.  As I was given £50 to spend on the room for improvement I went into town planning to only buy used items from charity shops. On top of finding great deals for previously owned items the money goes to charity.  However that did not go to play this time around.  I was planning on buying items I found, instead of going in with a plan of what I wanted and it can be a hit or miss at the charity shops.  With being on foot and having to carry everything home I changed my game plan after attempts in two shops.  A T.K.Maxx just opened in Bath, England and they have a pretty nice selection of home wares   Sure enough in about twenty minutes I was ready to check out after spending close to the £50.  
 T H E   A F T E R   P H O T O S : 

Also to note I used one of my fashion photographs from Hawaii under the glass table top and recovered the IKEA reading chair with our Thai bed spread and matching pillow we brought back from Thailand.

 I love the travel accents because it not only fits our family but becomes a great conversational starter.
 I do plan to eventually use the fabric over the couch to make additional couch pillows.  I found the fabric earlier on in the year at a farm shop in the vintage second hand section and fell in love with the pattern.

On top of the bookshelf is my Eiffel Tower figure, a ceramic paint painted with a scene of the Bay of Naples, where I grew up as a child, and a smaller globe that had previously been in my sons’ room when they had an Indiana Jones themed bedroom. 
 The photos on the shelf are mostly of my family during those silly western styled shoots.  The two that are not fit in with the theme.  One is my oldest at two months old when I dressed him up in his Build-A-Bear cowboy outfit and the other is of my dad, mum, and my husband when they got their photo with Woody at Disneyland.  My dad is in half of the photos and since he has passed away, they are my favourite ones to display.   There is also a hores shoe turned hook and the symbolic gift of a girl horseback riding my husband gave me as a place holder for a new riding helmet.

Though this little table will have to move when I need to dry laundry, we really wanted to make use of the wasted space the space heater takes up.  We decided to use the table that matches it in colour to keep it friendly to the eyes.  Would like to eventually get a table that half the normal table size in width to go over the space heater and give us a place to set our drinks and decanter. 
This is close up of the fabrics included in this room for improvement challenge.

What I Purchased:

A Globe. As we sort of had a few travel items already I chose a nice focus item to help solidfy the theme of the room.  It was £24 and at half my budget it was a risk I was willing to take after finding everything else I needed for such low prices.  I normally never would buy something like this for myself and it was lovely to be able to improve my room with such a great accent piece. 
Black Place Mat. This item that I found in the kitchen area has a faux leather appearance.  I liked that it matched the globe  and knew it would tie in well with other black pieces in the room. Since our coffee table has grid like holes in it, having a nice flat surface would be a great improvement when it came to having a place to set our drinks.  It was only £2.99.
Two glases and a Dish.  Setting out to find some texture and detail to put in the space I found these two glasses and matching dish.  I though this would be perfect for my husband and I who like to enjoy a drink together after the kids go to bed.  The dish would be perfect for a snack item, like the olives pictured in the after photos. Remember just because an item has one intended purpose, does not mean it can not be used for something else. This was true with these three items which were sold to be used in a bathroom. However they fit nicely in our living room and are pictured as vases here. 
Glass Container with metal stamped lid. I was originally looking for a large vase I could display items in. Something that I could easily interchange for seashells at summer or christmas bobbles in the winter.  I found this lovely piece for only £5.99 and decorated it with silk flowers I had in storage. 

White Paper Lantern. When I saw the price for this at a hardware shop, I could not leave without purchasing it.  It was a simple, easy, and cheap way to improve the room. I just wonder why I had not done this sooner. This cost £3.

The Breakdown:
Globe – £24.99
Glass Container – £5.99
Two Glasses – 7.98
Dish – £2.99
Placemat – £2.99
Light Fixture – £3.00
Total: £47.94 


After the room was all ready and the photos had been taken I called my husband in from outside.  He was improving our backgarden, where the grass has been growing like wildfire.  What better way to refresh from the hot sun then a nice glass of white wine and some olives to snack on too. 
So this was how I tackled the Room for Improvement Challenge in a rented house with just £50.  
Q: What do you think?  Any thoughts or suggestions?

Wedding: Fresh Flowers or DIY Paper Flowers?

When I got married in 2003 my colour were a dark wine red and white.  I poured over wedding magazines to find the type of flowers I wanted to compliment that theme.  I looked at vendors and then I got the quote from the florist.  My heart just sunk.  What I really wanted in the way of flowers would put me far out of budget.  However what I could afford was far from my personal taste.  The bouquets I was shown had a lot of fillers, a lot of greenery  and babysbreath.  Ten years ago I was not a fan of  the latter and I didn’t like the way the green fillers in the bouquets took away from my colour scheme.  Really how expensive could flowers be?  I did my research and I found company who would sell me 200 wholesale bulk roses for only $200.  I chose 100 black magic roses (the dark red ones in my bouquet below) and 100 white roses.  I was so excited because this was far cheaper than anything the florist showed me and it was exactly what I wanted.  The flowers came a few days before the wedding and we followed the simple directions to get them ready.  The night before my mum helped the bridesmaids make the bouquets and she also put together the boutonnieres. 
My 50 stem bouquet with Black Magic roses.
So now that we are renewing our vows I am looking at flower options again.  Since we are already married and this is our renewal, I do not have the same budget I had back in 2003.  It is a much smaller and more intimate affair and we will be traveling to Wales to our holiday rental for the event. So far I have yet to find a florist near to the area that would be able to help me out.  I have also been looking at ordering flowers online again. However smaller budget for flowers and not really liking anything I am finding online.  Lucikly this time around we have the ever so popular Pinterest website.  As you can see below I have a board dedicated to ‘I Do Again – Flowers’ and these would be my most recent pins. 
Follow me on Pinterest: http://pinterest.com/bonnierose_/

With August still months way I have set anything in stone. However I have held on to one idea for the last two months that still seems like a lovely and viable option.  Paper flowers.  Paper is cheaper than fresh flowers so it fits my budget.  There is the technical side that is involved in the decision to use paper flowers.  Just how likely will it be that I can replicate any of the paper bouquets right now is up in the air.  I also have been saving a ton of egg cartons because since we mostly eat Paleo we go through eggs very quickly.  I saw how you can make flowers out of the empty cartons and that is another idea I am keeping in mind.  Next to my egg cartoons I am also keeping every wine bottle and all the jars from our honey, coconut oil, olives, peanut butter, etc.  So far I have quite a collection.  It looks like if making my own flowers from recycled goods works I will have plenty to also use on tables and for decorations.

Here is just a sample of what I have saved so far from the recycling that we usually put outside for collection.

My question today is: have you ever made flowers from paper and recycled goods, past the age of 10?  What do you think about doing a eco friendly bouquet by repurposing materials from around the house? Did you find neat ways to save money for the flowers in your wedding?

Sweet Heart Tea Tag

Tea Bags & Sweet Hearts for Valentines Day
I had one of my sweet heart teas yesterday for Pancake Day.
I took shopping bags I had saved from Christmas and used heart punches to punch out the hearts.  With a piece of hemp twine I sandwiched it between two hearts and secured with an adhesive. 
With a needle I sewed the end of each tea tag to the tea bag. 
Pretty and glittery pink tea tags for our Valentines Day tea.

*Photographs and wording by Bonnie Rose Photography © 2013 All Rights Reserved

Popart Superhero Birthday Party

Maddox as Batman for his 5th Birthday party at the bowling alley.  He chose the theme of Justice League and I tied in a little Pop Art to give it an added PUNCH! (No pun intended)
Older brother, Ronan, went as Green Lantern.
Batman & Green Lantern before the party commences. 
Batman, Superman, and Green Lantern. 
11 boys (plus two younger ones not pictured) all together.  England is not so big on dressing up for things. We had2 boys that were Justice League themed, one marvel superhero, one Indiana Jones (um, might have gotten confused from Ronan’s party invite back in January?),  one police officer, and four in plain street clothes.  I think in hindsight I should have just had Maddox dress up and made capes for all the other kids for better themed photo.  Or try it again in the USA. 
This was our party host who orchestrated the whole bowling party.  She was amazing.  Keeping 11 boys under the age of 9 in line while dealing with heavy bowling balls is not an easy feat. 
Maddox and boys lining up to start bowling. 
Maddox bowling at his birthday party. 
The birthday banner I made from Flash comics with Maddox’s name on it. We used it to decorate the party table. 
The party bags that I made with the Pop Art comic book theme. I bought a bag of confetti and glued each dot on, one at a time. 
The table center piece  with the pop art dots and an M (for Maddox) and a 5 (for his age) which I collaged in Flash and DC comics. 
Each boy got a photo frame/thank you card that I collaged individually in comics. 
Another look at the photo frame/thank you cards. 
Since the cake pops fell through, I decorated lollipops with masks and capes.  Using a two tier cake stand, I decorated it with the cup cake toppers I made. 
Another look at the center piece. 
Wonder Woman and Batman gift tags. 
I believe all the photo frame/thank you cards were Flash themed.  
Maddox telling his dad, Superman, how much fun he is having at his party. 
Holy Cupcakes Batman it is time for food! (Sadly with the cake pops not turning out, we ended up leaving the back up cake at home. So no singing at this party.  Thats okay because they don’t eat birthday cake at the kid parties in England. 
As the kids were getting ready to leave, we quickly rounded up a few of them for a very quick photo with the felt masks I sewed and put in each of the goodie bags.

Photography by Bonnie Rose © Bonnie Rose Photography 2012 All Rights Reserved. 
http://www.bonnie-rose.co.uk
bonnie@bonnie-rose.co.uk